Close Menu
    Facebook X (Twitter) Instagram
    News Decker
    • Tech
    • Health
    • Apps
    • Business
    • Fashion
    • Games
    • Entertainment
    • Sport
    • Travel
    • News
    Facebook X (Twitter) Instagram
    News Decker
    Home » How Can I Fix QuickBooks Error Code H202 Manually?
    Business

    How Can I Fix QuickBooks Error Code H202 Manually?

    AndrewBy AndrewFebruary 27, 2023No Comments4 Mins Read
    Facebook Twitter Pinterest LinkedIn Tumblr Email
    QuickBooks
    QuickBooks
    Share
    Facebook Twitter LinkedIn Pinterest Email

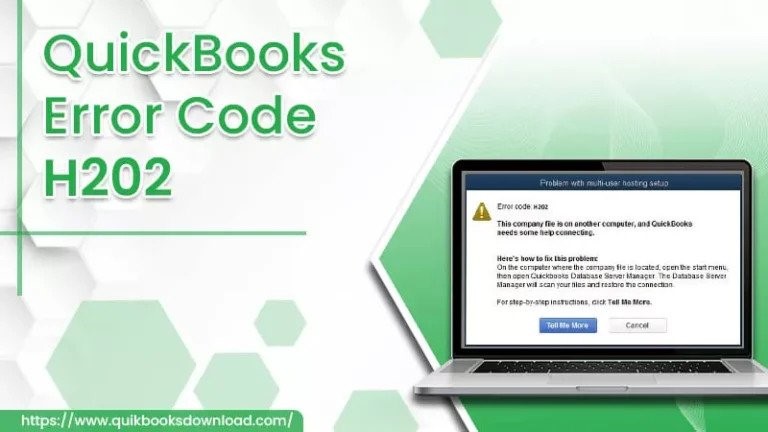
    How Can I Fix QuickBooks Error Code H202 Manually?

    QuickBooks is a multi-functional accounting software that enables small and medium-sized organizations to handle their business accounting. It provides many features like creating invoices, filing state and federal taxes, and many others. The most amazing service, Multi-user access, makes the users work on the company files with multiple users. But while switching to multi-user mode, they face QuickBooks error code H202. This can appear due to various reasons, which we will discuss in this blog. We also help you in resolving the error from your QuickBooks.

    What Causes QuickBooks Error Code H202?

    Below are some factors that are responsible for the error H202:

    • Hosting settings were incorrectly configured.
    • There is a conflict with the DNS server.
    • When the QuickBooks services on the server are turned off.
    • Because of damage or corruption in the .Network Data (ND) files
    • When QuickBooks is unable to determine the IP address of the host system.
    • Internal QuickBooks services such as QBFCMonitir and QuickBooksDBXX are not running on the server computer.
    • The firewall on the server computer prevents all incoming and outgoing communication.
    • The QuickBooks Database Server Manager does not respond.
    You Might Like  5 secret tips to grow your property investment portfolio in 2023

    After knowing about the reasons, let’s fix the error.

    How to Fix QuickBooks Error Code H202 Manually?

    Here, you will get manual solutions that can quickly fix the error.

    Solution 1: Check Services on your Server

    If you are running QuickBooks full version on the server computer, you must enable multiple-user hosting in order to resolve QuickBooks error code H202. To begin, consider the following:

    • Launch QuickBooks on your server computer.
    • Then, go to the File menu and select “Utilities.”
    • Then, if you see the Host Multi-User Access option, select it. You are not required to select the Stop Hosting Multi-User Access option.
    1. To begin, navigate to the Windows Start menu on your server computer.
    2. Then, in the Windows search box, type Run and press Enter.
    3. Now, compose the “services.msc” into the field of the Run box and then hit the Enter key.
    4. Then, from the list, search for and double-click QuickboosDBXX. The XX indicates the QuickBooks version.
    5. Then, for the Start Type, select Automatic.
    6. After that, make sure the Service Status is Started or Running. If not, then hit the Start button.
    7. Now, go to the Recovery tab and fix the QuickBooks error code H202.
    8. Choose Restart the Service from the following dropdown menus: First Failure, Second Failure, and Subsequent Failures.
    9. Click Apply, followed by OK.
    You Might Like  Growth Strategy: Templates To Plan Business Goals

    Solution 2: Ping Your Server From A Workstation

    Ping your server from a workstation to check the connection. Ping your server from each workstation, getting QuickBooks Error Code H202 Manually  To start, turn on Network Discovery on your server computer and any workstations with Error H202:

    1. Go the Windows Start and open its menu on the server and workstations.
    2. Type “Network” in the search and launch Network and Sharing Center.
    3. Select Change advanced sharing settings.
    4. Ensure that the Turn on network discovery is chosen from the Network Discovery and File and Printer sharing sections.

    Next, obtain your server’s name from it:

    1. On your server computer, go to the Windows Start menu.
    2. Open Run by typing “Run” into the search bar.
    3. Enter “CMD” in the Run window and press Enter.
    4. In the CMD window, type “ipconfig/all” and press Enter.
    5. In the Windows IP Configuration section, look for the Host Name. The name of your server appears on the right.
    6. Make a note of the hostname or copy it to a word document so you can find it quickly.
    You Might Like  Creative and Effective: Real Estate Postcard Ideas to Generate Leads and Build Relationships

    Return to your workstation and test the server. These steps can become complicated, so you may want to seek assistance from an IT professional.

    1. From a workstation, open the Windows Start menu.
    2. Open Run by typing “Run” into the search bar.
    3. Enter “CMD” in the Run window and press Enter.
    4. Enter “ping [your server name]” and hit Enter. Do not use brackets around your server name.
    5. This displays the command window and the path you must enter to ping your server.
    6. Rep these steps for each workstation that is experiencing Error H202.

    Wrapping Up

    Through the medium of this blog, we present the manual methods to fix the QuickBooks error code H202 manul. We also provide you the reasons for the error occurrence in QuickBooks. However, if the error continues, then feel free to contact the ProAdvisors to resolve the error completely. Thank You!
    business
    Share. Facebook Twitter Pinterest LinkedIn Tumblr Email
    Andrew
    • Website

    Leave A Reply Cancel Reply

    You must be logged in to post a comment.

    The Benefits of a Cat C Driving Licence

    September 11, 2024

    Behind the Scenes of a Tattoo Parlor: a Glimpse Into Tattoo Culture

    January 10, 2024

    Back Pain Treatment – What You Need to Know

    January 8, 2024

    Utilizing Social Media Analytics for Audience Engagement and Content Optimization

    January 1, 2024
    Facebook X (Twitter) Instagram Pinterest
    • Privacy Policy
    © 2025 News Decker. Contact Us [email protected]

    Type above and press Enter to search. Press Esc to cancel.

    We use cookies on our website to give you the most relevant experience by remembering your preferences and repeat visits. By clicking “Accept”, you consent to the use of ALL the cookies.
    Do not sell my personal information.
    Cookie SettingsAccept
    Manage consent

    Privacy Overview

    This website uses cookies to improve your experience while you navigate through the website. Out of these, the cookies that are categorized as necessary are stored on your browser as they are essential for the working of basic functionalities of the website. We also use third-party cookies that help us analyze and understand how you use this website. These cookies will be stored in your browser only with your consent. You also have the option to opt-out of these cookies. But opting out of some of these cookies may affect your browsing experience.
    Necessary
    Always Enabled
    Necessary cookies are absolutely essential for the website to function properly. These cookies ensure basic functionalities and security features of the website, anonymously.
    CookieDurationDescription
    cookielawinfo-checkbox-analytics11 monthsThis cookie is set by GDPR Cookie Consent plugin. The cookie is used to store the user consent for the cookies in the category "Analytics".
    cookielawinfo-checkbox-functional11 monthsThe cookie is set by GDPR cookie consent to record the user consent for the cookies in the category "Functional".
    cookielawinfo-checkbox-necessary11 monthsThis cookie is set by GDPR Cookie Consent plugin. The cookies is used to store the user consent for the cookies in the category "Necessary".
    cookielawinfo-checkbox-others11 monthsThis cookie is set by GDPR Cookie Consent plugin. The cookie is used to store the user consent for the cookies in the category "Other.
    cookielawinfo-checkbox-performance11 monthsThis cookie is set by GDPR Cookie Consent plugin. The cookie is used to store the user consent for the cookies in the category "Performance".
    viewed_cookie_policy11 monthsThe cookie is set by the GDPR Cookie Consent plugin and is used to store whether or not user has consented to the use of cookies. It does not store any personal data.
    Functional
    Functional cookies help to perform certain functionalities like sharing the content of the website on social media platforms, collect feedbacks, and other third-party features.
    Performance
    Performance cookies are used to understand and analyze the key performance indexes of the website which helps in delivering a better user experience for the visitors.
    Analytics
    Analytical cookies are used to understand how visitors interact with the website. These cookies help provide information on metrics the number of visitors, bounce rate, traffic source, etc.
    Advertisement
    Advertisement cookies are used to provide visitors with relevant ads and marketing campaigns. These cookies track visitors across websites and collect information to provide customized ads.
    Others
    Other uncategorized cookies are those that are being analyzed and have not been classified into a category as yet.
    SAVE & ACCEPT